Tuesday 26 February 2013

Scrappy piping - Tips & Tricks Tuesday linking party

Today I very honoured to welcome you all to my turn on hosting the Tips & Tricks Tuesday. If it is your first time around here, a very warm hello from me and all my followers... This fantastic series is hosted by Erin at Sew at Home Mummy, and it is full of great tips for us crafters!

Sew at Home Mummy

So I have been giving quite a bit of thought about what to post, I like sewing, knitting, crochet and embroidery... so I wasn't sure which way to go... but there is one common thing in all the crafts I make, and it is that I don't like to waste... I work with such beautiful fabric, yarn and threads... that I don't like seeing much of them in the bin...

I have been working lately on a herringbone quilt top and cutting biased edges on the rectangular blocks means lots and lots of little triangles were lying around ready for the bin...and all the time while sewing I kept asking myself what to do with them... I really did not want to let them go...

So I came up with the Scrappy Piping idea for the matching cushions...


What do you need?

Tiny little scraps of all sort, it can be from one project (like mine) or from many different projects for a multicolour look. In any shape and size they will all work great (but I used the tiny little ones that normally go to the bin). And you will also need piping cord and a project that could use some piping like bags, pillow cases, etc.


Step 1 - Start sewing those little scraps in pairs, right sides facing together. You are looking for their longer side (my triangles had a side that measured 3 and a bit inches, so I went for that one as the seam). You may want to try to get a smaller seam allowance than normal, to maximise the use of the fabric. Chain sewing is the ideal method to get them done as quickly as possible. Press seams open.


Step 2 - Now sew together (again chain sewing) those pieces in pairs, and keep going until you get stripes of pieced fabric smaller than your cutting mat and ruler but the longer possible. I did mine 20 inches long (for the purpose of this tutorial and easy pictures I am just showing a few scraps together).


Step 3 - I cut my piping stips at 1.5 inches, so I squared up my stripes to 3 inches and then cut them in half. If you didn't manage to make a 3 inch wide strip with your scraps then just cut it to 1.5 inches.


Join those strips together to make a really long piping strip. I managed to get 6 meters (19.6 foot) long.
To prepare it for the actual piping I suggest to roll it up like this.


Step 4 - Now you can just use your normal method for preparing the piping, just be careful that you are working with lots of seams and there may be some fabric bulk in the process, so suggest going a bit slower than normal. I use my zip foot and go to the sewing machine with the cord and the fabric roll. And as I sew the fabric around the cord as I go (I do not use pins, it just takes to much time).


And voila, you have the piping cord ready to use in your next project. I will be showing you all the pillow covers I made for my bedroom a little later this week, but here is a sneak peak:


Do you have any tips and tricks or tutorial that you would like to share? Please link your posts below, new or old posts are welcome just as long as it has some handy information to share around! And don't forget to visit around and have fun!


Friday 22 February 2013

Cute pouch

Yey! I made my first ever pouch... I have had some experience with zips (not very successful though) but I can say I am pretty happy about this one... oh it is so cute.


It is a practise run for a couple of pouches I am planning... but they are a little surprise... It was inspired for a friend...that I thought would find very handy to have a little pouch where she could carry a few things around... a little book, her phone, maybe a little sewing... 


So this pouch uses a 30cm zip and it is quite tall to fit all her things! For the outside I used a lovely, gorgeous... and so hard to let go, Cath Kidston fabric. If you don't know her fabric lines and you like romantic stuff, you must check it out! And matched it with a light blue zip and a little red ribbon as a finishing touch.

And of course so my friends remembers that I hand made it for her, my tag is in the front! With my little heart sending her my love!


The lining inside is the pink stripes fabric from the Simpatico collection... oh these fabrics are so versatile I used them for so many different projects!

In order to make it extra spacey  the bottom is 2 inches wide! 


I didn't really used one pattern for this pouch. I did a lot of research on-line, looked at what the different tutorials were suggesting and embarked in my own pattern/tutorial adventure. This was really a practise pouch, but don't despair, the tutorial and pattern will be coming up really soon.


Wednesday 20 February 2013

A sneak peak into my sewing room

I love doing this weekly update on what I am working on as it focuses me on what I want/need to get done! I am very happy to report that all the projects from last week's sneak peaks are done... the blog posts are coming along as well.

Husband's scarf is all done as well and it is currently soaking in water and I will block it today to try to resolve a little curling issue I have... and I am planning on posting the pattern very soon for all the yarn lovers that follow me around!

But I cannot help but show you some sneak peaks into my sewing room... and living room... and bedroom... yes my crafty stuff is everywhere!


I have finished two really cute (I am in love with them) pillows for our bedroom and the quilt top... and managed to come up with a very cool binding idea that I will be showing you all next week when I host the Tips & Tricks Tuesdays.

Tips & Tricks Tuesdays at Sew at Home Mummy

And the matching quilt top for our bedroom is also finished... I love the colours, love the piecing... just need to get the backing fabric... still trying to decide what to use... so I can get on with the quilting...


And finally I also started an embroidery project... to finish the decorations in the bedroom... I saw this idea in a wallpaper and now I am thinking of a two more matching designs... hopefully I will have some new patterns drawn up soon!


So lots of new things to look forward too in the upcoming weeks! And shop related news... I am launching a new Easter design very soon... and all the orders I am working on this week are also new designs... so expect to hear a lot on that front as well!
And I have added a few new patterns in the Craftsy Pattern store from the last few projects in the blog, don't forget to check those out!

Linking up to WIP Wednesdays at Freshly Pieced


Have a great crafty weekend!


Tuesday 19 February 2013

Modern Love pattern giveaway winner

So last week I took part in the hugs and kisses blog hop and presented this pattern to you all...


It is a very simple four colour counted cross stitch pattern. What I find most difficult about cross stitch is the placing of the design... where do I start with my fist cross? But given the placement of the letters and that there are only four of them, this design should be quite easy to follow!

You can find the pattern on my Craftsy shop (I use Craftsy as you can download the pattern immediately and not wait until I email it to you).

And as part of the hop I offer to give one lucky winner a free copy of the pattern... so drum roll please.... Mr Random piked...
Congratulations Barbara Woods from Wont to be quilter on wining the pattern, I have emailed you so you can claim your gift! And look forward to seeing your finished project soon! I have already emailed you to confirm that you won and I will send the pattern to you soon!


Monday 18 February 2013

All the yarn I can hide

A little bit ago I did this embroidery for the in your words blog hop... and I had a few comments saying that they loved the words but they were not really for them as these ladies were knitters or crocheters. 


So something had to be done about this...


And this is how my new embroidery pattern came about! It reads "My husband lets me have all the yarn I can hide" and it features a ball of yarn and a little long knitting piece.

The words are embroidered on an ombre thread that changes from dark to really light pink. They were all embroidered in tiny little chain stitches to make them "pop-up". It also has a tiny little red heart.


The needles, knitting piece and the yarn loose from the ball are made in backstitch. The knitting piece has some flowers on it and the ball is just filled in with long stitches in different directions to give it the feel of a yarn ball.


And look how lovely it looks all framed up! It is currently sitting in my sewing/spare room waiting to see who is it going to go to... any suggestions?

If you would like to make your own embroidery you can purchase the pattern in my Craftsy pattern shop. A link is also included in the tutorial section of the blog. You can also leave me a comment with your email address and I can send it to you directly (payment via paypal).

Enjoy your stitching!


Friday 15 February 2013

Sopley Village WI - a custom order

Sopley Village in Dorset is very close to my heart, as it is where I spent most of my time when visiting the UK. It was really great to hear that my mother in law and other ladies from the village have gotten together and formed the Sopley Village WI.

And with those news came a custom order... I was to make a table cloth to be used at the main table in the meetings. Something modern, colourful and bright that stands for what these ladies are trying to achieve.


So here is what I made. I designed the letters, I used as guidance some fonts I liked on-line, but I basically changed the shapes to display more of the fabric. Then I transferred into fabric and appliquĂ©d them into a table cloth big enough so that the letters would show on the side of the table.


The fabrics I used were given to me by my mother in law at Christmas, so I thought she would like them in the table cloth. They are a combination of blues and purples which really stand out on the white background.


The letters were appliquĂ©d using a simple embroidery stitch along all the borders to ensure the table cloth can be easily washed and will (hopefully) not fray!

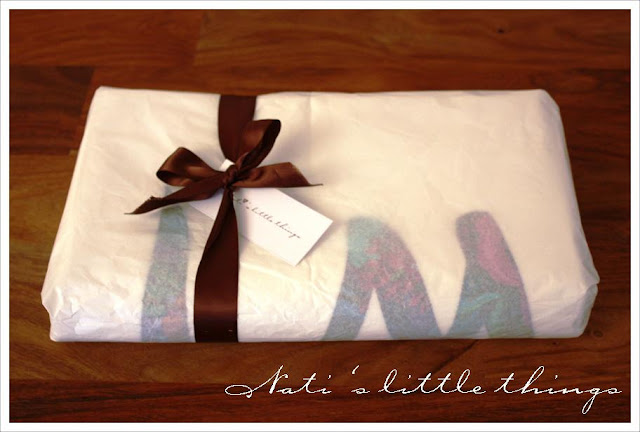
So this is how it looked all wrapped up and ready to be sent to Sopley. I already heard from my mother in law and she loved it (but what is she going to say?). I look forward to hearing from the rest of the Sopley Village WI.


So if you happen to live nearby, please sign up to the meeting next Tuesday, I am sure there is exiting things to come (I am looking into doing some workshops soon as well) and then let me know what you think of the table cloth!


Wednesday 13 February 2013

WIP Wednesdays

Hello again, it is Wednesday... where has the week gone? Husband and I indulged in a little early Valentine's present and spent the weekend in Paris... Oh la la how much I love that city! If I must confess I really didn't care much about sightseeing... all I wanted was a lovely box of Pierre Herme macaroons (which I got!) and tea and cakes at Laduree in Avenue de Champs Elysees... and my husband obliged and spoiled me with both...

And then we did walk lots and lots... Notre Dame de Paris, le Louvre, jardin de Tuileries, l'Arc de Triomphe, Avenue George V and la tour eiffel... And mass at Basilique du Sacre Coeur de Montmartre...it was just the perfect trip.

So what have I been working on the rest of the week? Well the knitting is two thirds done and looking fantastic! And I worked on a few little projects that I am sharing with you next week... but I can't help myself and here are the sneak peaks.


Practising my paper foundation pieces with a pattern from Kristy @ Quiet Play. She was kind enough to let me be one of her pattern testers...

And a little gift for a friend that lives far away... looking forward to sending this to her soon!

So what are you working on this week?


As usual I am linking up to WIP Wednesdays at Freshly Pieced (follow button above).


Tuesday 12 February 2013

Modern Love stitching and giveaway

Today is my turn to share my Valentine's creation for the Hugs & Kisses blog hop. I am sharing the day with lots of amazing crafters... but first of all a big thank you to Mdm Samm for always organising such entertaining hops and to Jane from Janesfabrics.com for cheering us all along.

So what have I made this time?

I call it a "Modern Love", and it is a cross stitch embroidery made on Aida 16 count fabric. So how did I came up with this idea for the hop... funny story actually! My friend Ana (who is by the way the lucky recipient of this embroidery) and I went to the modern art museum in Luxembourg a few weekends ago. We looked around the art, and some items that I don't think can really be considered art, etc etc and ended up loving... the plates at the museum restaurant!


So on the way back from dropping Ana back from the airport... I knew it! I had to make this embroidery for her. Downloaded a really cool app for my ipad and designed my take on the modern love cross stitch!


I am really happy with how it looks like, and after a few changes to the original pattern I think it would be a great project for any modern art lover! So in my new venture of having a little on-line shop I have decided I will also offer my patterns on my Craftsy shop.

But in the meantime, and as a thank you for stopping by, I am offering one of my readers the chance to win the pdf pattern! All you have to do is be a follower (email, google friends, facebook or Pinterest or all!) and leave me a sweet comment here. I will draw a winner on Valentine's day and announce it shortly after.

Update: The giveaway is now closed, winner will be announced shortly.


And of course the fun hasn't finished yet! You have all these other talented ladies to visit and see what amazing things they have created for this very romantic hop!


Nati's Little Things - You are here!


Friday 8 February 2013

New ironing board cover and peg bag

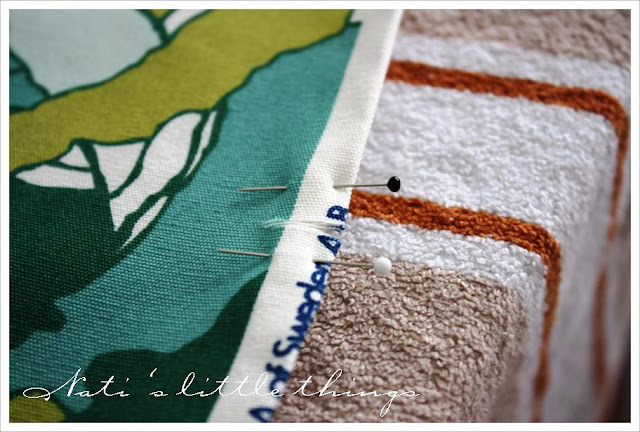
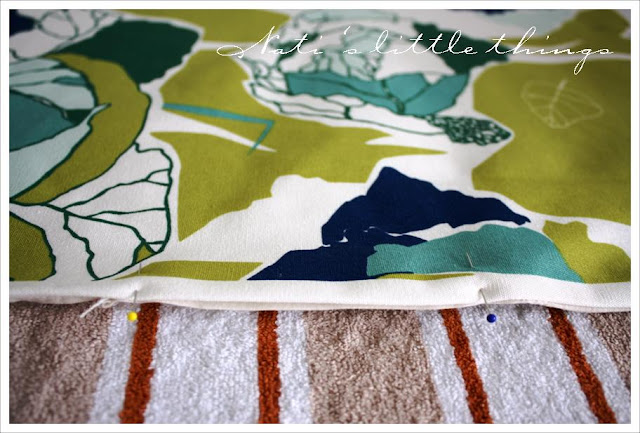
So my ironing board was looking dull, burnt and old... nothing that a trip to Ikea and some handy sewing could not fix... So took the car, went to Ikea (second drive ever on the motorway! - expect many more Ikea finds now that I am driving!) and voila new iron board cover and peg holder.


I find Ikea's fabric a great find, cheap overall and good quality. This is a sturdy cotton canvas that seemed great at the time... and now that is on the ironing board I can tell you that it also works great.

So if you are in the mood for an ironing cover revamp, here is a handy tutorial for you!

What you will need?
  • 1 yard of cotton canvas (that will be enough for the ironing board cover and the peg bag)
  • 3/4 yards of lining fabric (I used an old bed sheet as it will not be seen at all in the finished product)
  • Ironing board in need of a revamp 
  • Old ironing board foam (or 1/2cm thick foam in the size and shape of your board)
  • 4 meters of cord (any will do)
  • Sewing notions


1) Strip your old ironing board cover, we will use this as a template and lay it flat on top of the new fabric facing down.


2) Trace around the ironing board cover leaving at least 1/2 inch for sewing allowance. In my case I left approximately 2 inches around as I wanted it to have more fabric in the back to avoid the cover slipping out as it used to happen with the old one.


3) Cut a 3/4 inch on the fabric (I did it in a spot where I left some salvage to prevent fraying). This will be the whole in which we insert the cord at the end.

4) Cut the lining a tiny bit bigger than the fabric in case there is some shifting when sewing. I do that by setting the lining under the canvas fabric, pinning them together and then cutting around.


5) Set the lining and the canvas fabric right sides together and sew around the perimeter using a 1/2 inch seam allowance. Leave an opening to turn inside out.


6) Make little cuttings in all rounded sections of the seam to help the seam set nicely when turned inside out.


7) Turn inside out and iron thoroughly to set all the seams, specially the curves. In the opening we left, iron the seam in and sew it close. As this section will be in the back of the cover, I machined sewed it 1/8 from the border. 


8) Pin the opening from both sides to ensure there will be no shifting of the fabric in the next step.


9) Sew all around the perimeter of the cover, I used a little bit more than 1/2 inch to make sure I wasn't sewing over the seam. This will help avoid sewing through a lot of fabric. When you get to the cut we made you should be right at the start of it. Backstitch a few times to prevent it from opening up more in the future.


10) Take one end of the cord and pin it to the fabric. This is basically to prevent you from pulling the cord in. Then with the other side attached to a clothes pin pass it inside all around the cover.

11) Set the cover on top of the board, using the old lining (it would normally be a layer of foam). Pull tight from the cord, making sure it is nice and even, and voilĂ , finished ironing board cover.


I added this picture of the back for you to see how it will look like from the inside... feel free to use any old sheet or fabric you don't like for lining as you can see, it won't show!

If you are interested in making the clothes peg with your leftover fabric, follow the link in the tutorial section above or here.


LinkWithin

Related Posts Plugin for WordPress, Blogger...